


The following figure illustrates the object list for the Tablespaces folder.
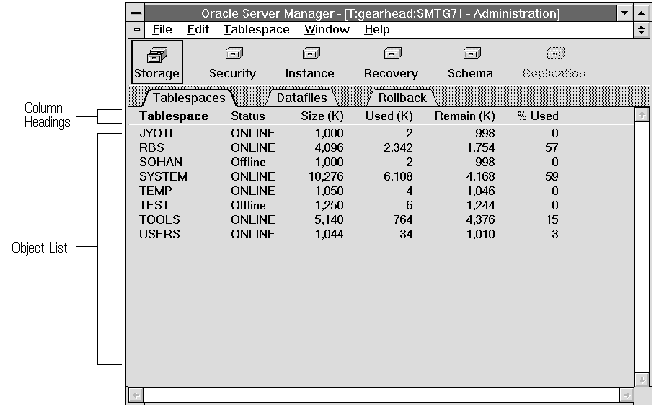 Figure 2 - 4. Tablespace Object List
In Figure 2 - 4, the Tablespaces object list is sorted on the first column and the column heading Tablespace is bold. In the following figure the Tablespace object list is sorted on the Size column and the column heading Size (K) is bold.
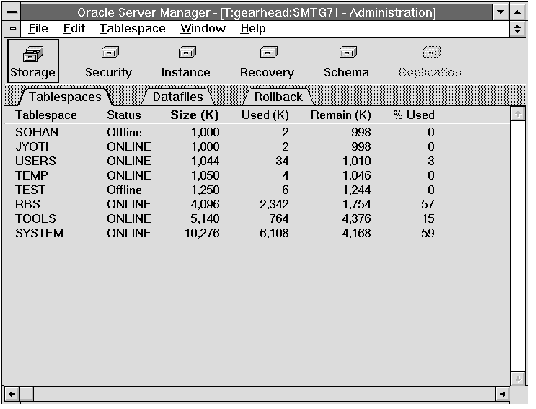 Figure 2 - 5. Tablespace Object List Sorted on the Size Column
The following figure shows a selected tablespace in the Tablespace object list.
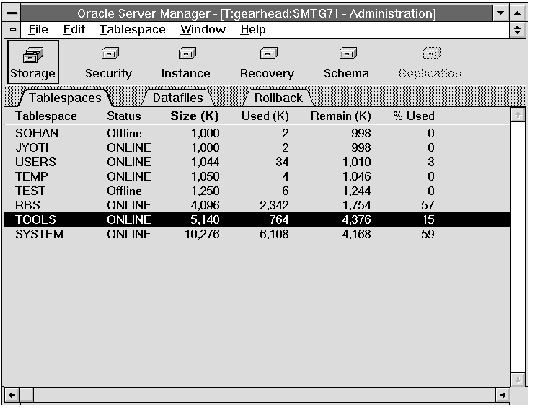 Figure 2 - 6. Selecting an Object
Suggestion: In most cases, double-clicking an object selects it and issues an Alter command on that object.
A menu item can be dimmed even when an object is selected because the command does not apply to that particular object. For example, in the following figure, the Place Online menu item is dimmed because the selected tablespace is already online.
 Figure 2 - 7. Tablespace Pull-Down Menu
Some menu items are followed by an ellipsis (...). This indicates that to complete the command, Server Manager will prompt you for more information with a dialog box or property sheet.
All folder menus have a Refresh command, which refreshes the object list for the current folder. This command is useful when other database administrators are making changes to the objects you are viewing, or when you are making such changes in a different window, such as a SQL Worksheet.
The following figure illustrates the Alter Tablespace property sheet, which consists of two pages:
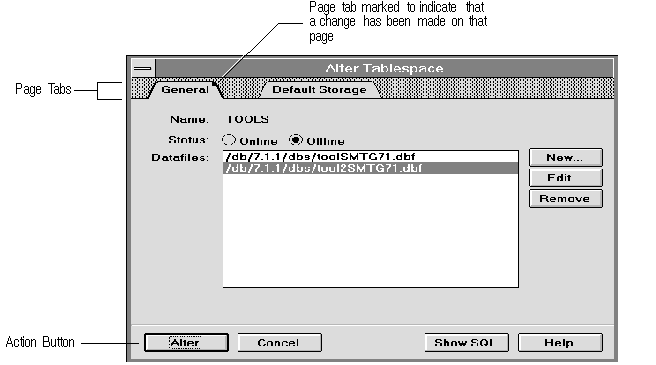 Figure 2 - 8. Property Sheet with Two Pages
The elements of a property sheet are described below:
| Page Tabs | Organize the pages within the property sheet. To go to a particular page, click its page tab. |
| When you have entered information or made changes on a page, the page tab is marked to remind you that a change has been made. | |
| Action Button | Performs the current operation, such as Alter or Create. |
| Cancel Button | Exits the property sheet without performing the operation. |
| Show SQL/Hide SQL Button | Displays or hides the SQL statement(s) generated by the property sheet. For information about the Show SQL/Hide SQL button, see "Showing SQL Statements" ![[*]](jump.gif) . . |
| Help Button | Displays help information for the page. |
Click Hide SQL to hide the SQL statements.
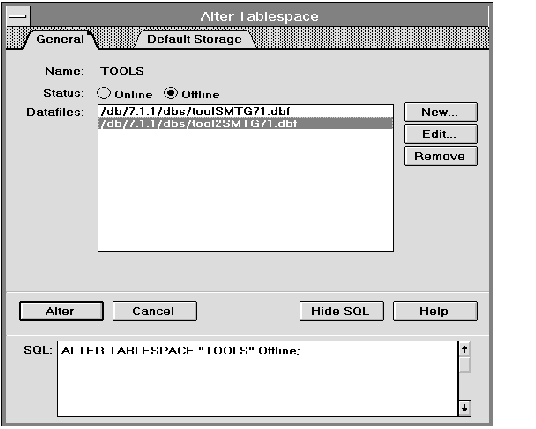 Figure 2 - 9. Property Sheet with the Show SQL Option Selected